Upload Image from Postman to Salesforce
Jan 3, 2025
Attaching files to Salesforce via Postman involves two key steps:
Obtaining an access token.
Using the
POSTmethod to upload the file.
Here’s a step-by-step guide to help you achieve this
Step 1: Get an Access Token
Before making API calls to Salesforce, you need an OAuth 2.0 access token.
Steps to Obtain an Access Token: Get Access Token Using Postman
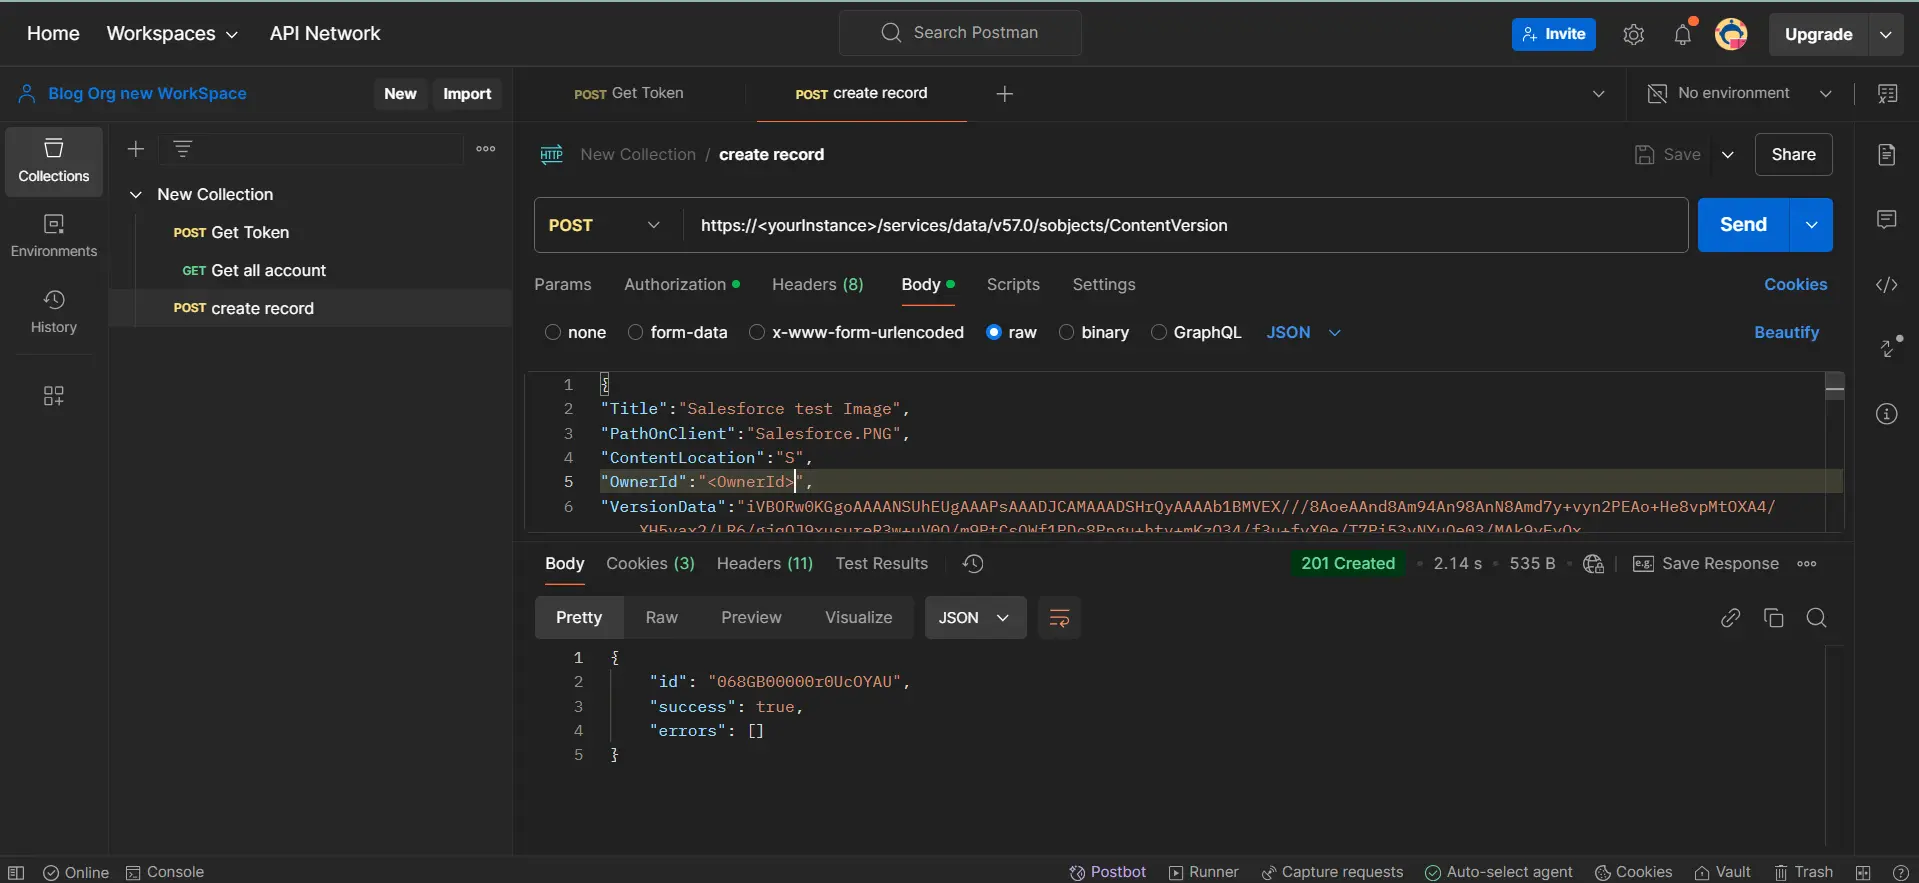
Step 2: Upload the File Using the POST Method
Endpoint
To upload a file to Salesforce, use the ContentVersion API:
-
Set Up the Request:
Method:
POSTURL:
https://<yourInstance>/services/data/v57.0/sobjects/ContentVersion/
-
Add Headers:
Authorization:Bearer <Your Access Token>Content-Type:application/json
-
Add the Body (as raw JSON):
{
"Title": "Salesforce Test Image",
"PathOnClient": "Salesforce.PNG",
"ContentLocation": "S",
"OwnerId": "<OwnerId>",
"VersionData": "<Blob of the image>"
}
Title: The name of the file as it will appear in Salesforce.
PathOnClient: The original name of the file on the client device.
ContentLocation: Indicates whether the file is stored internally (
S) or externally.OwnerId: The Salesforce user ID who owns the file.
VersionData: The file's data encoded in Base64 format. You can use tools like Postman or programming libraries to encode your file into Base64.
-
Send the Request:
Click Send in Postman.
If successful, Salesforce will return a JSON response with details about the uploaded file, including the
ContentDocumentId.
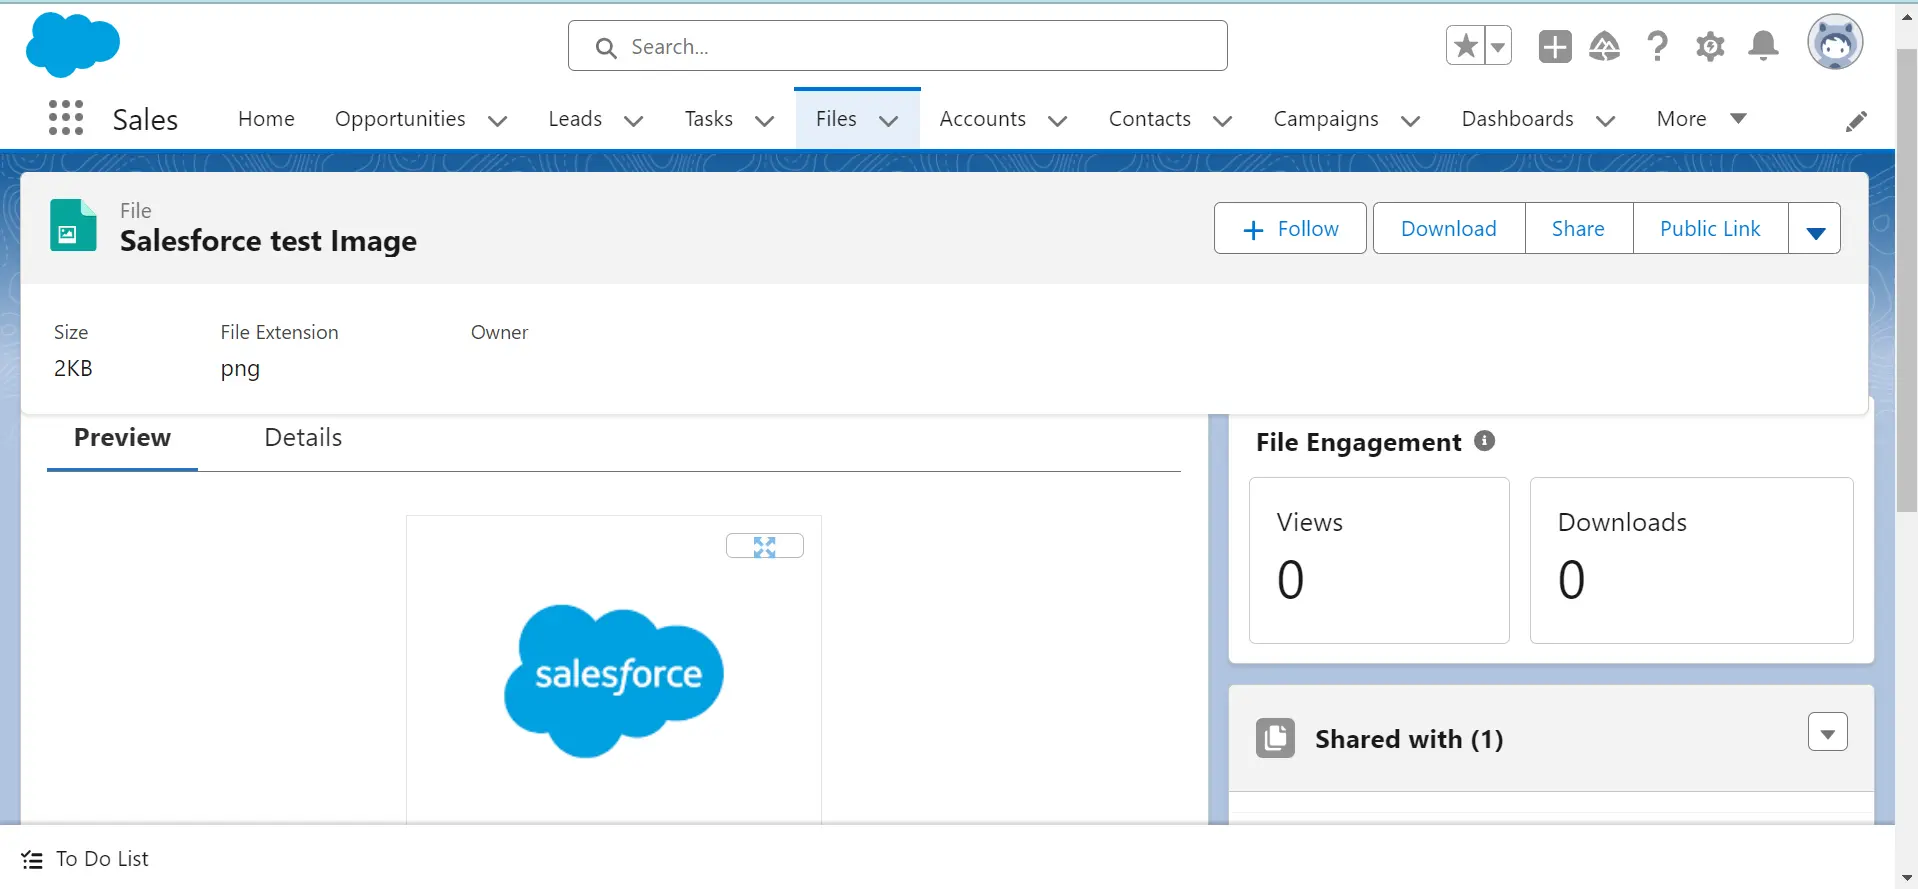
Step 3: Verify the File in Salesforce
After uploading, you can verify the file:
Navigate to the Files tab in Salesforce.
Search for the file we just created with title name.
Confirm that the file has been uploaded and is accessible.