How to Use AgentForce in Salesforce using Flow
April 14, 2025

After completing this unit, you will be able to understand how AgentForce runs.
- AgentForce is Designed for Specific Organizations.
- What is AgentForce?
- How is it used in Salesforce?
AgentForce is Designed for Specific Organizations
AgentForce is not available for all Salesforce organizations by default. It is designed for businesses that require AI-powered automation to enhance sales, service, and marketing operations. If your organization is eligible, you can set up an AgentForce environment by following the official Salesforce Trailhead guide. Click here to learn more
What is AgentForce?
Agentforce is Salesforce's AI-powered platform that enables businesses to create and deploy autonomous agents to handle tasks across various functions, such as sales, service, marketing, and commerce. These agents can autonomously resolve customer issues, qualify sales leads, and optimize marketing campaigns, thereby enhancing operational efficiency and customer engagement.
How is it used in Salesforce?
- Create a flow
Auto-Launch Flow in Salesforce. This flow will fetch the Priority field from a Case record and assign it to an output variable.
- Create a New Auto-Launch Flow
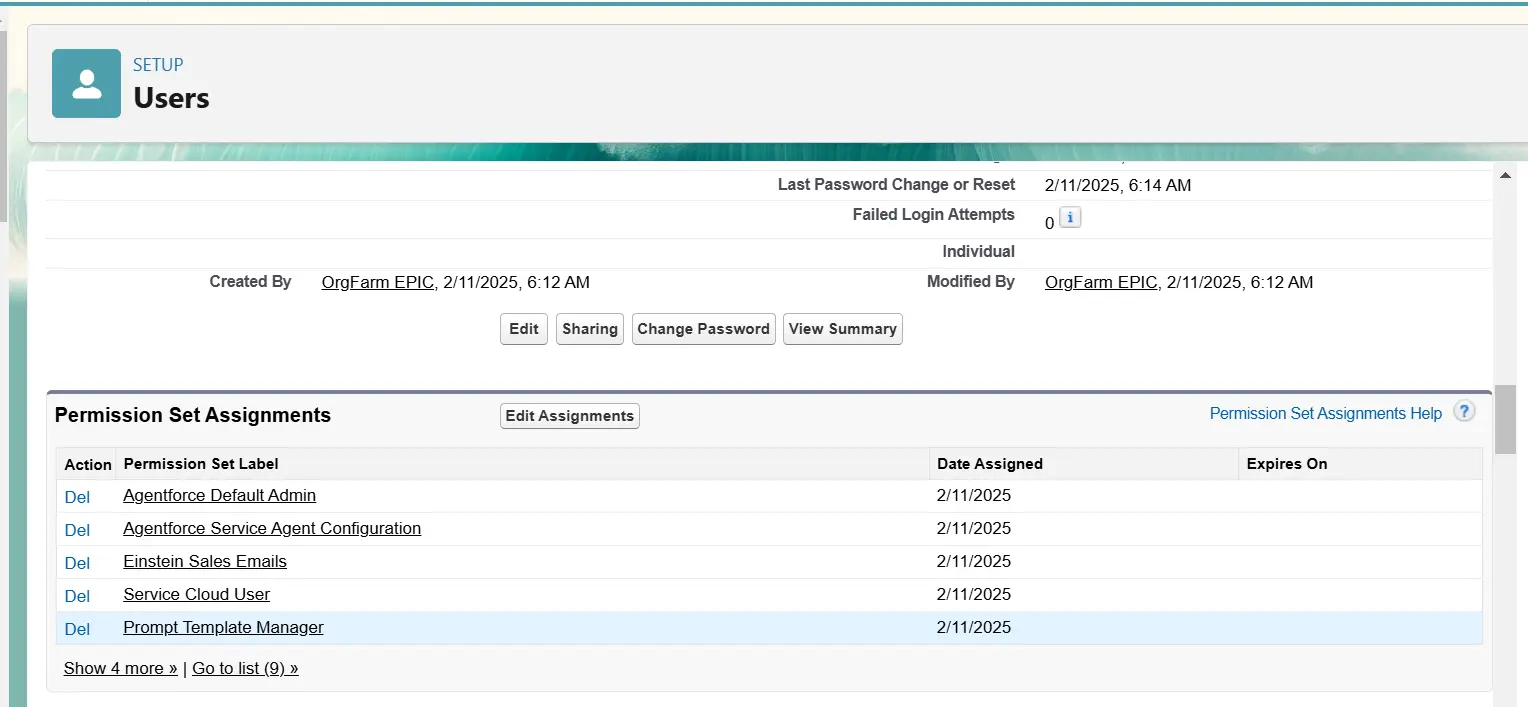
- Log in to Salesforce and go to Setup.
- Search for Flows in the Quick Find box.
- Click New Flow.
- Select Auto-Launch Flow (No Trigger) and click Create.
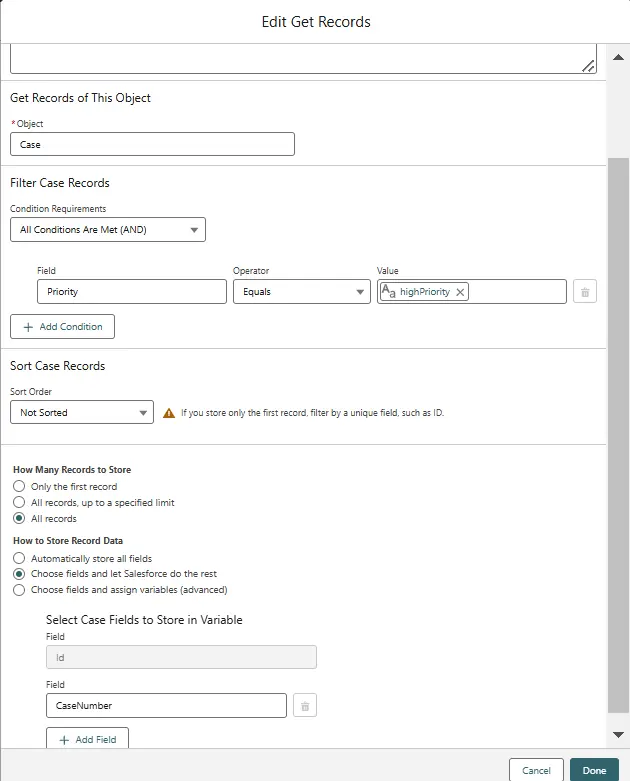
- Add a Get Records Element
- Click the "+" icon and select Get Records.
- Enter a label: Get Case Priority.
- Select Case as the object.
- Under Filter Case Records, set:
- Field Id
- Operator: Equals
- Value: Select Input Variable (Create a new input variable: var_Priority).
- Under Fields to Store, select Priority.
- Store All Records.
- Click Done.
- Create a New Auto-Launch Flow
- Add an Assignment Element
- Click the "+" icon and select Assignment.
- Enter a label: Assign Priority to Output.
- Create a new output variable:
- Variable Name: var_CasePriority
- Data Type: Text
- Availability: Available for Output
- CheckBox: Allow multiple values (collection)
- Set the assignment:
- var_CasePriority = Get Case Priority → Priority
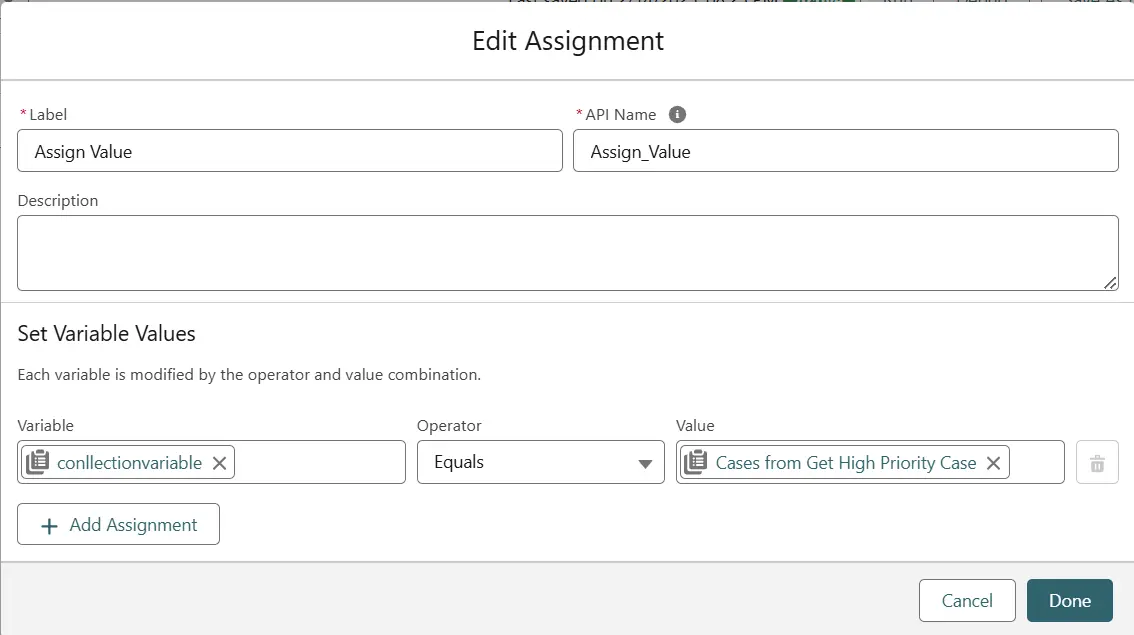
- Click Done.
- Save and Activate the Flow
- Click Save, and give the flow a name (e.g., AgentForce Get Case Priority).
- Click Activate.
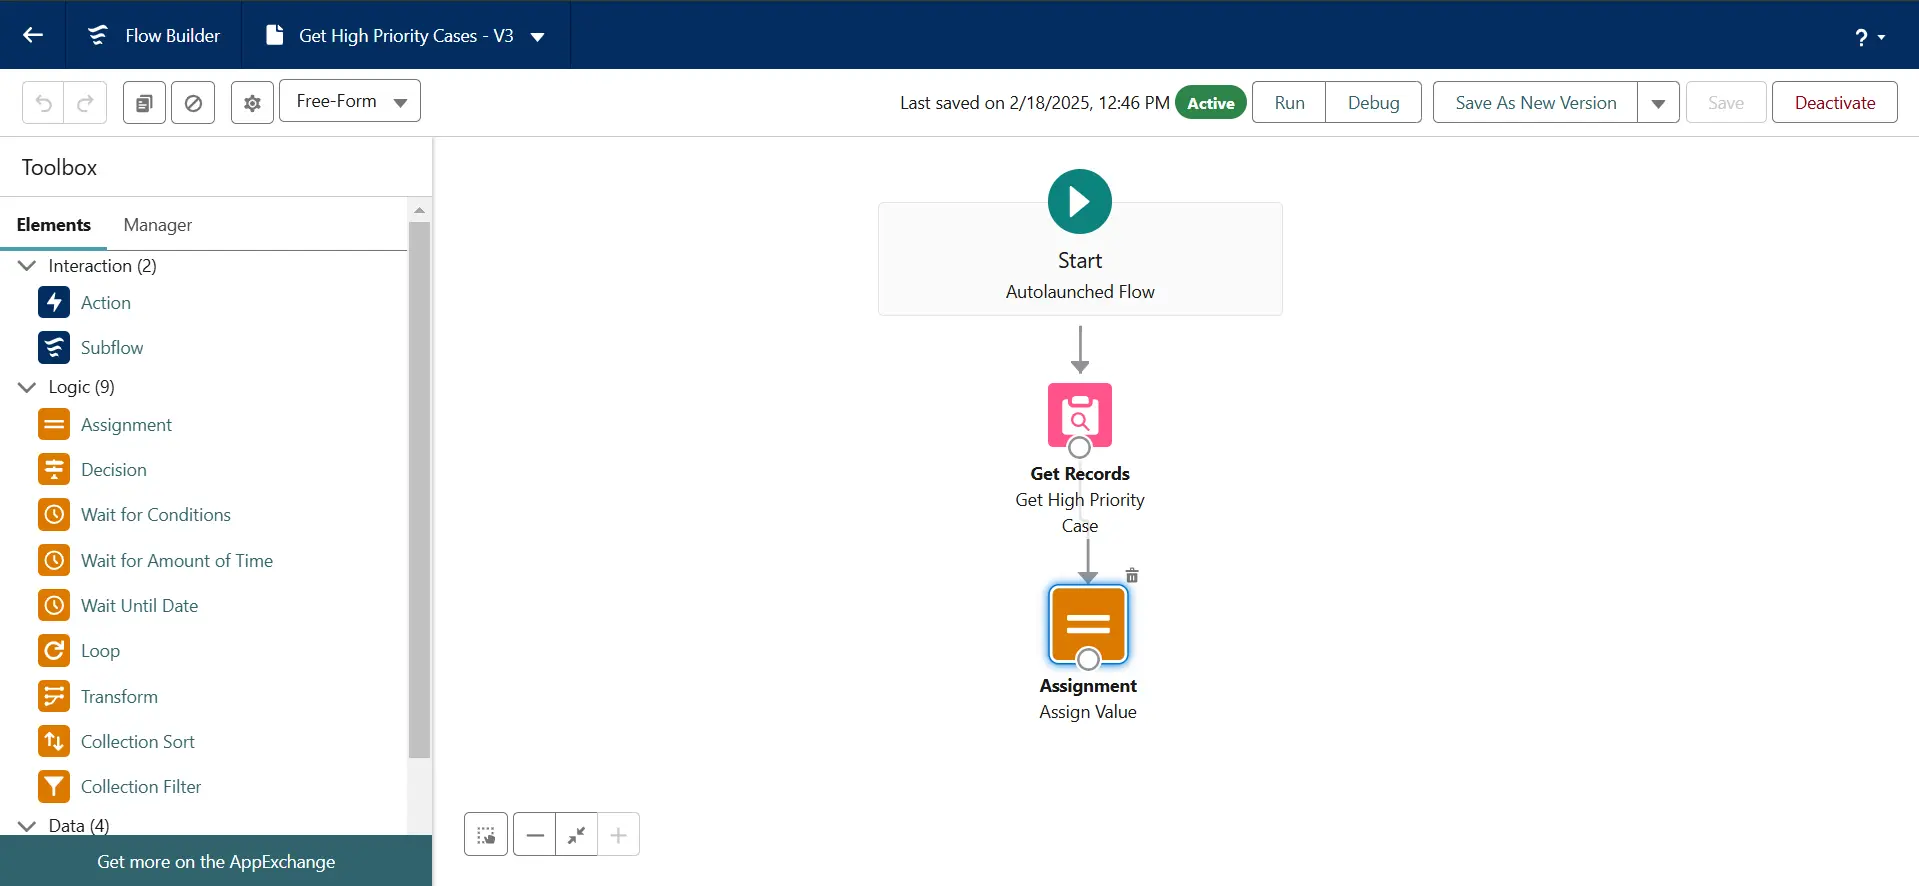
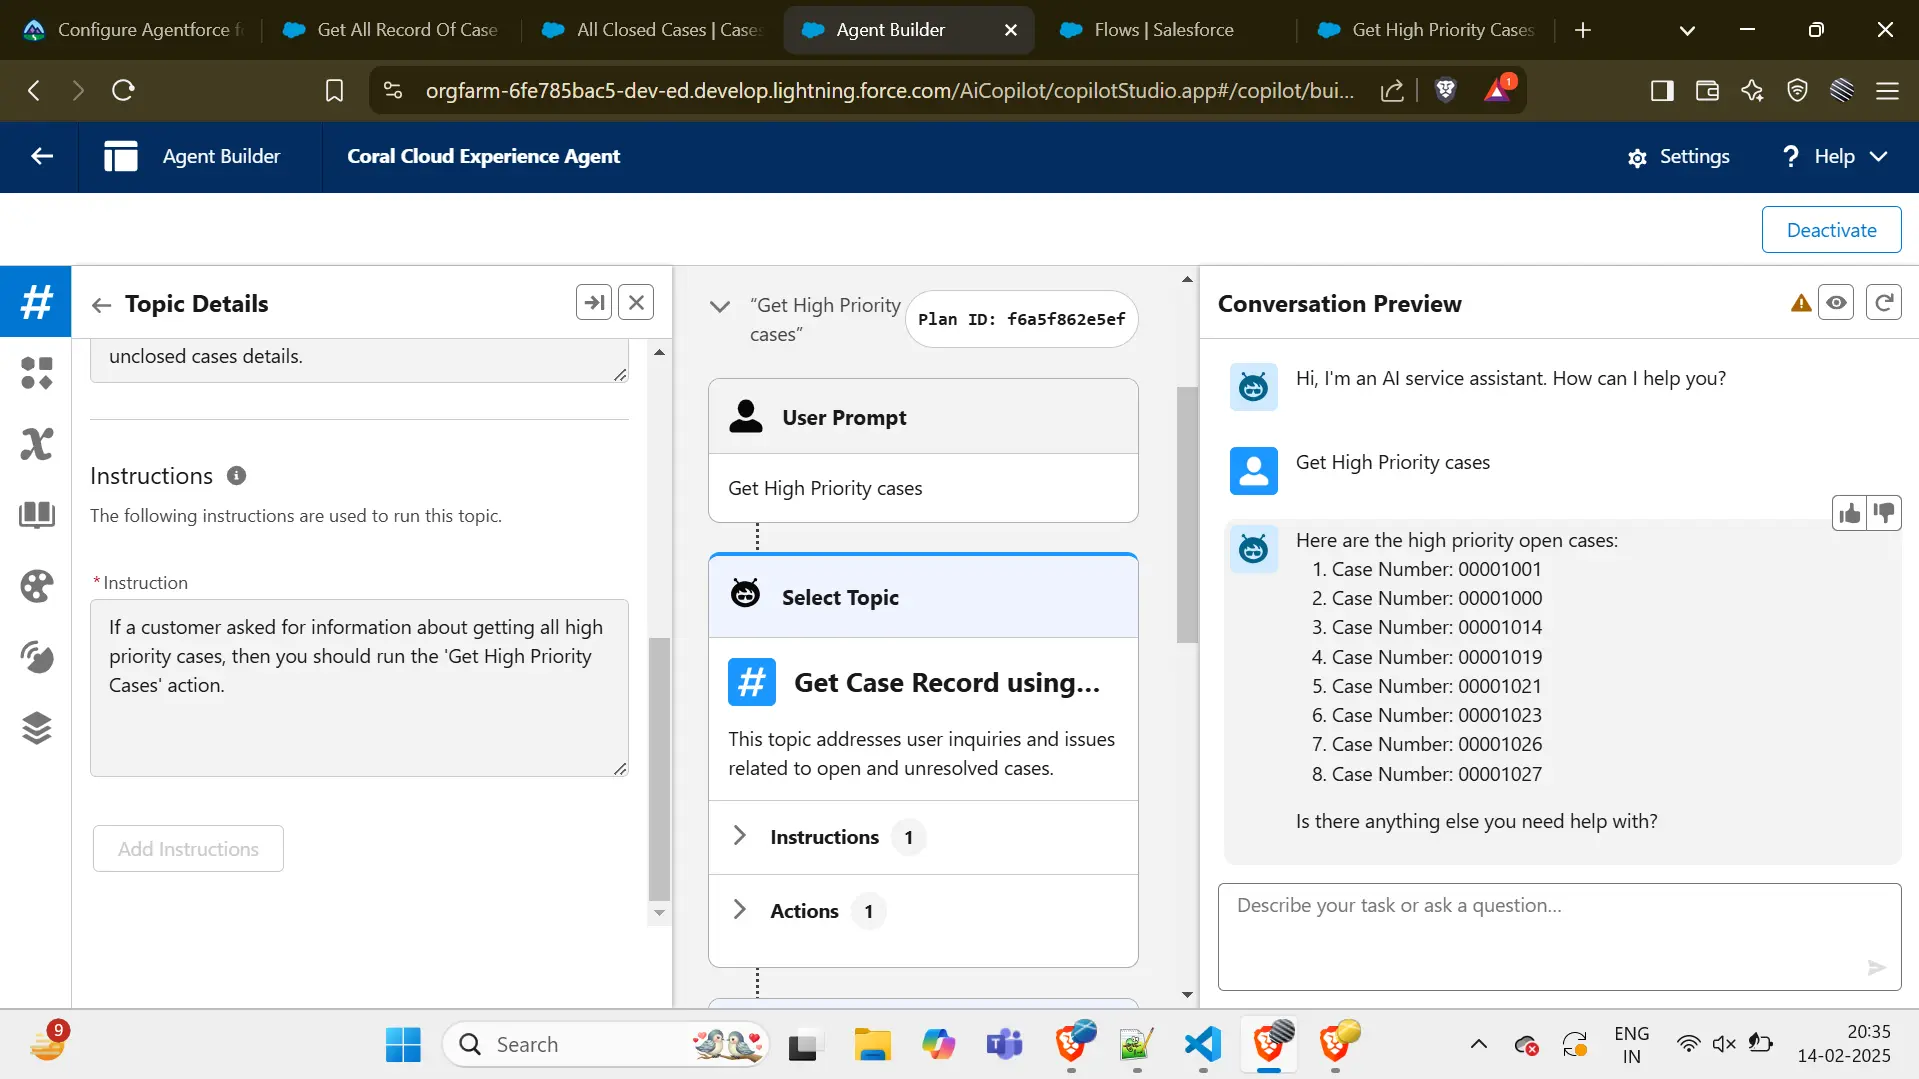
The created flow is then used in AgentForce Actions to automate tasks, retrieve case details, and enhance workflow automation. AgentForce triggers the flow to fetch and return the required data.
- Setup and Search for the Agent
- Open AgentForce.
- Click on Setup in the main menu.
- Use the Search bar to find "Agent".
- Click on Agent from the results.
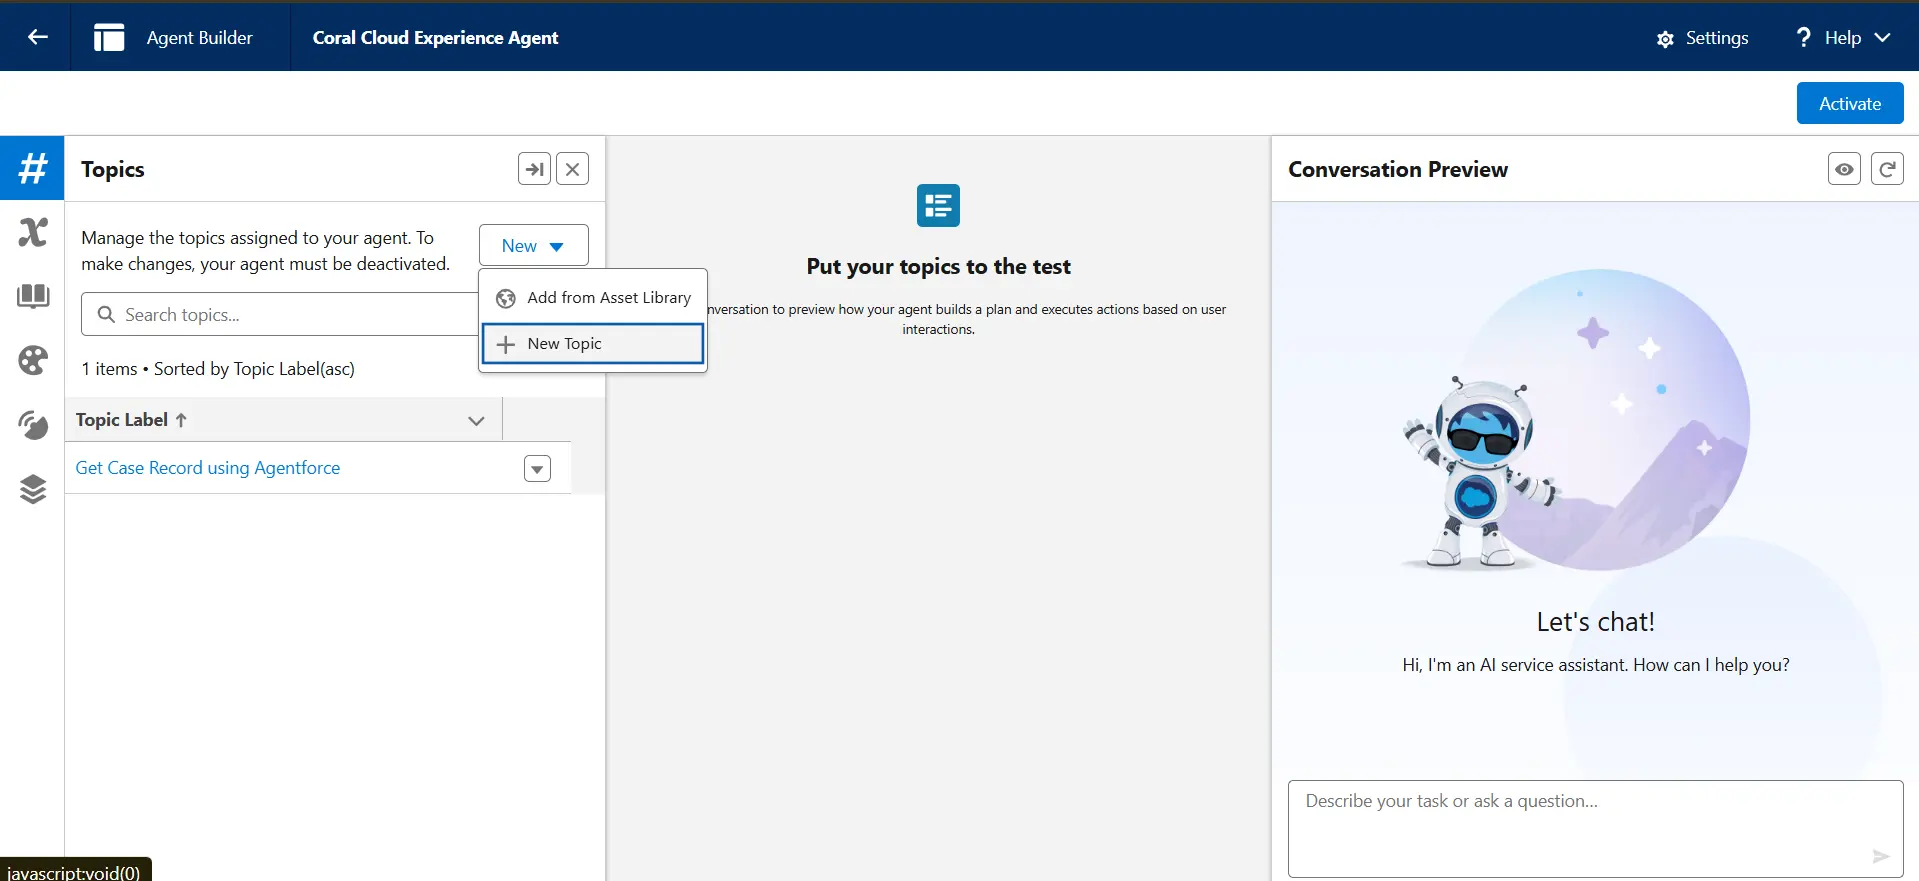
- Selecting Coral Cloud Experience Agent
- Locate Coral Cloud Experience Agent in the list.
- Click on it (it will be blank initially, meaning it’s ready for configuration).
- Open in Builder
- Click on Open in Builder to start configuring the agent.
- Create a New Topic
- Click on the New Tab button.
- Click Add New Topic to create a new conversation flow.
- Fill in the following details:
- Label: Name of the topic.
- Classification Description: Define what this topic is about.
- Scope: Define the boundary or extent of this topic.
- Instruction: Provide details about how the agent should handle this topic.
- Click Next and then Finish.
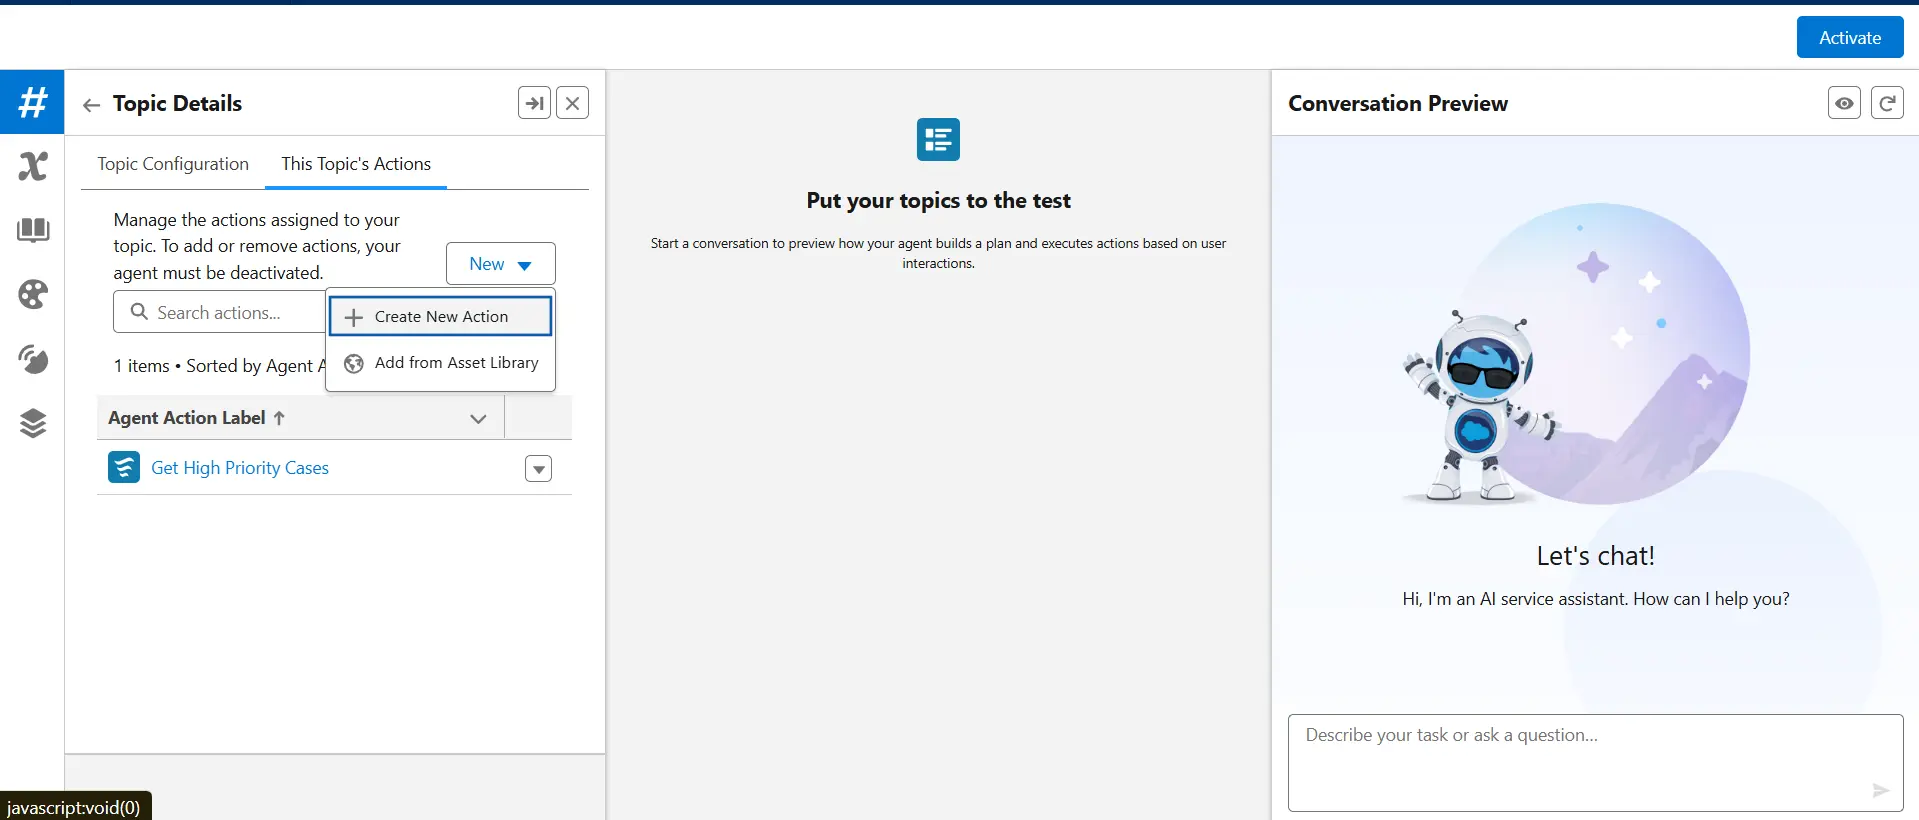
- Configure Actions for This Topic
- Navigate to This Topic’s Actions tab.
- Select Flow as the action type.
- Choose the relevant Flow from the list.
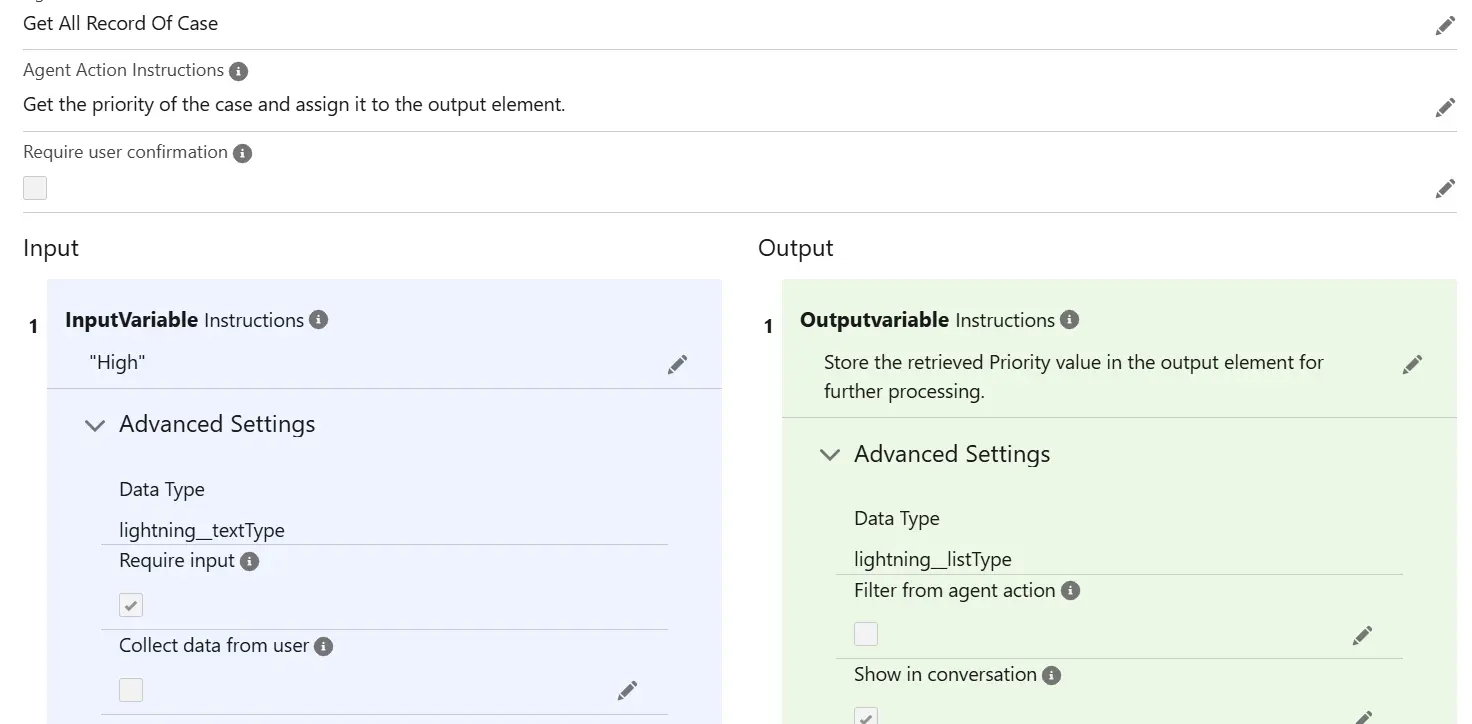
- Define Agent Instructions
- Fill in the following fields:
- Agent Action Instructions: Describe what the agent should do when handling this topic.
- Input Instructions: Define what kind of input is expected from the user.
- Output Instructions: Define what the agent should respond with.
- Fill in the following fields:
- Configure Input and Output Settings
- Check the box for Required Input (ensures necessary user input).
- Enable Show Conversation on Output (displays the conversation in the chat).
- Save the Configuration
- Click Save to finalize the setup.
Search in Chatbot for Values in AgentForce
- Go to Chatbot
- Search for values related to the topic
- Retrieve relevant data from AgentForce